How I use Karabiner to remap my Mac keyboard

A couple of months ago, I got a MacBook Pro. The first thing I need to do is to
remap the keyboard,
just like what did I with my Ubuntu laptop using keyd.
Once again, I realize the CapsLock is not useful enough for it to earn this
precious place. I keep accidentally pressing the CapsLock key, thinking it
will work like a Control key in Windows/Ubuntu. This post is about how I try
to replicate the setup I had in keyd to Mac with
Karabiner-Elements. I will show you how
to
- Create custom forward delete
- Using
z + h/j/k/las arrows - Switch between chosen apps with
z + <number> - Make
CapsLockuseful again by mapping it to multiple modifier keys, etc.
Spoiler, I underestimated the complexity it can get.
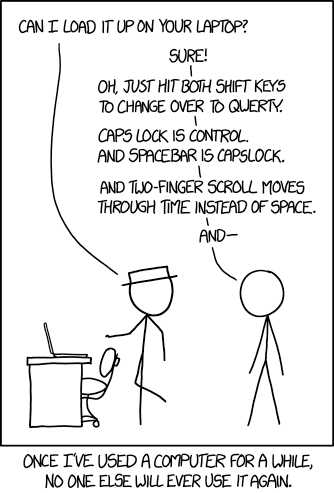
In reality, there are very few situations where my configuration would make my keyboard unusable by other people. You'll see below.
Keys that I Need to Remap
In my post about keyd, I shared what configurations I have on my Ubuntu laptop. Unfortunately, not all of it can be converted to Mac the way I want. I listed down what I need the most.
z + h/j/k/lfunction as arrow keysCapsLockmimic what I had for theCapsLockin Windows/Ubuntu- Function as
Cmdfor things like open/close tab, copy and paste, etc. - Function as
Ctrlfor things likeCtrl + d,Ctrl + uin Vim - Function as
Optfor backspace, likeCtrl + backspacethat backspace a word - Function as
Escwhen pressed alone
- Function as
There are also configurations that I specifically added because of Mac.
=+Deleteis the realDelete, deleting the character after the cursorz + <num>will open apps
In Mac, the Delete key is just backspace and there is no Delete key in the
layout. I added = and Delete press simultaneously works as a delete key
being pressed. And for the rest of the post, I will call the key labelled as
Delete on the keyboard as Backspace.
In Windows or Ubuntu, I can use Win + <num> to open apps that I pinned to the
dock. For example, Win+1 is always the terminal, Win+2 is the browser, etc. And
I can configure 10 apps that I frequently need and quickly switch between them
without the need to loop through Alt+Tab. However, surprisingly, Mac does not
have this feature! With that, I mapped z + <num> to apps that I frequently use
and switch between them.
In the keyd post, I shared a few more shortcuts for windows management, audio playback and shortcut strings, but I don't need those any more. Either Mac supports them well enough, or I really don't use them now. For example, the media play / pause / forward / backward comes by default in the media keys row on the Mac keyboard.
I choose Karabiner-Elements because I learned about it long time ago, even before I started remapping my keyboards. Back then, I was not using a Mac, so I started with AutoHotkey on Windows and keyd in Ubuntu. Now I got my hands on a Mac, I did not consider other alternatives before choosing Karabiner.
This post goes through my configurations in Karabiner one by one. All of my configurations are complex modifications in the Karabiner-Elements app.
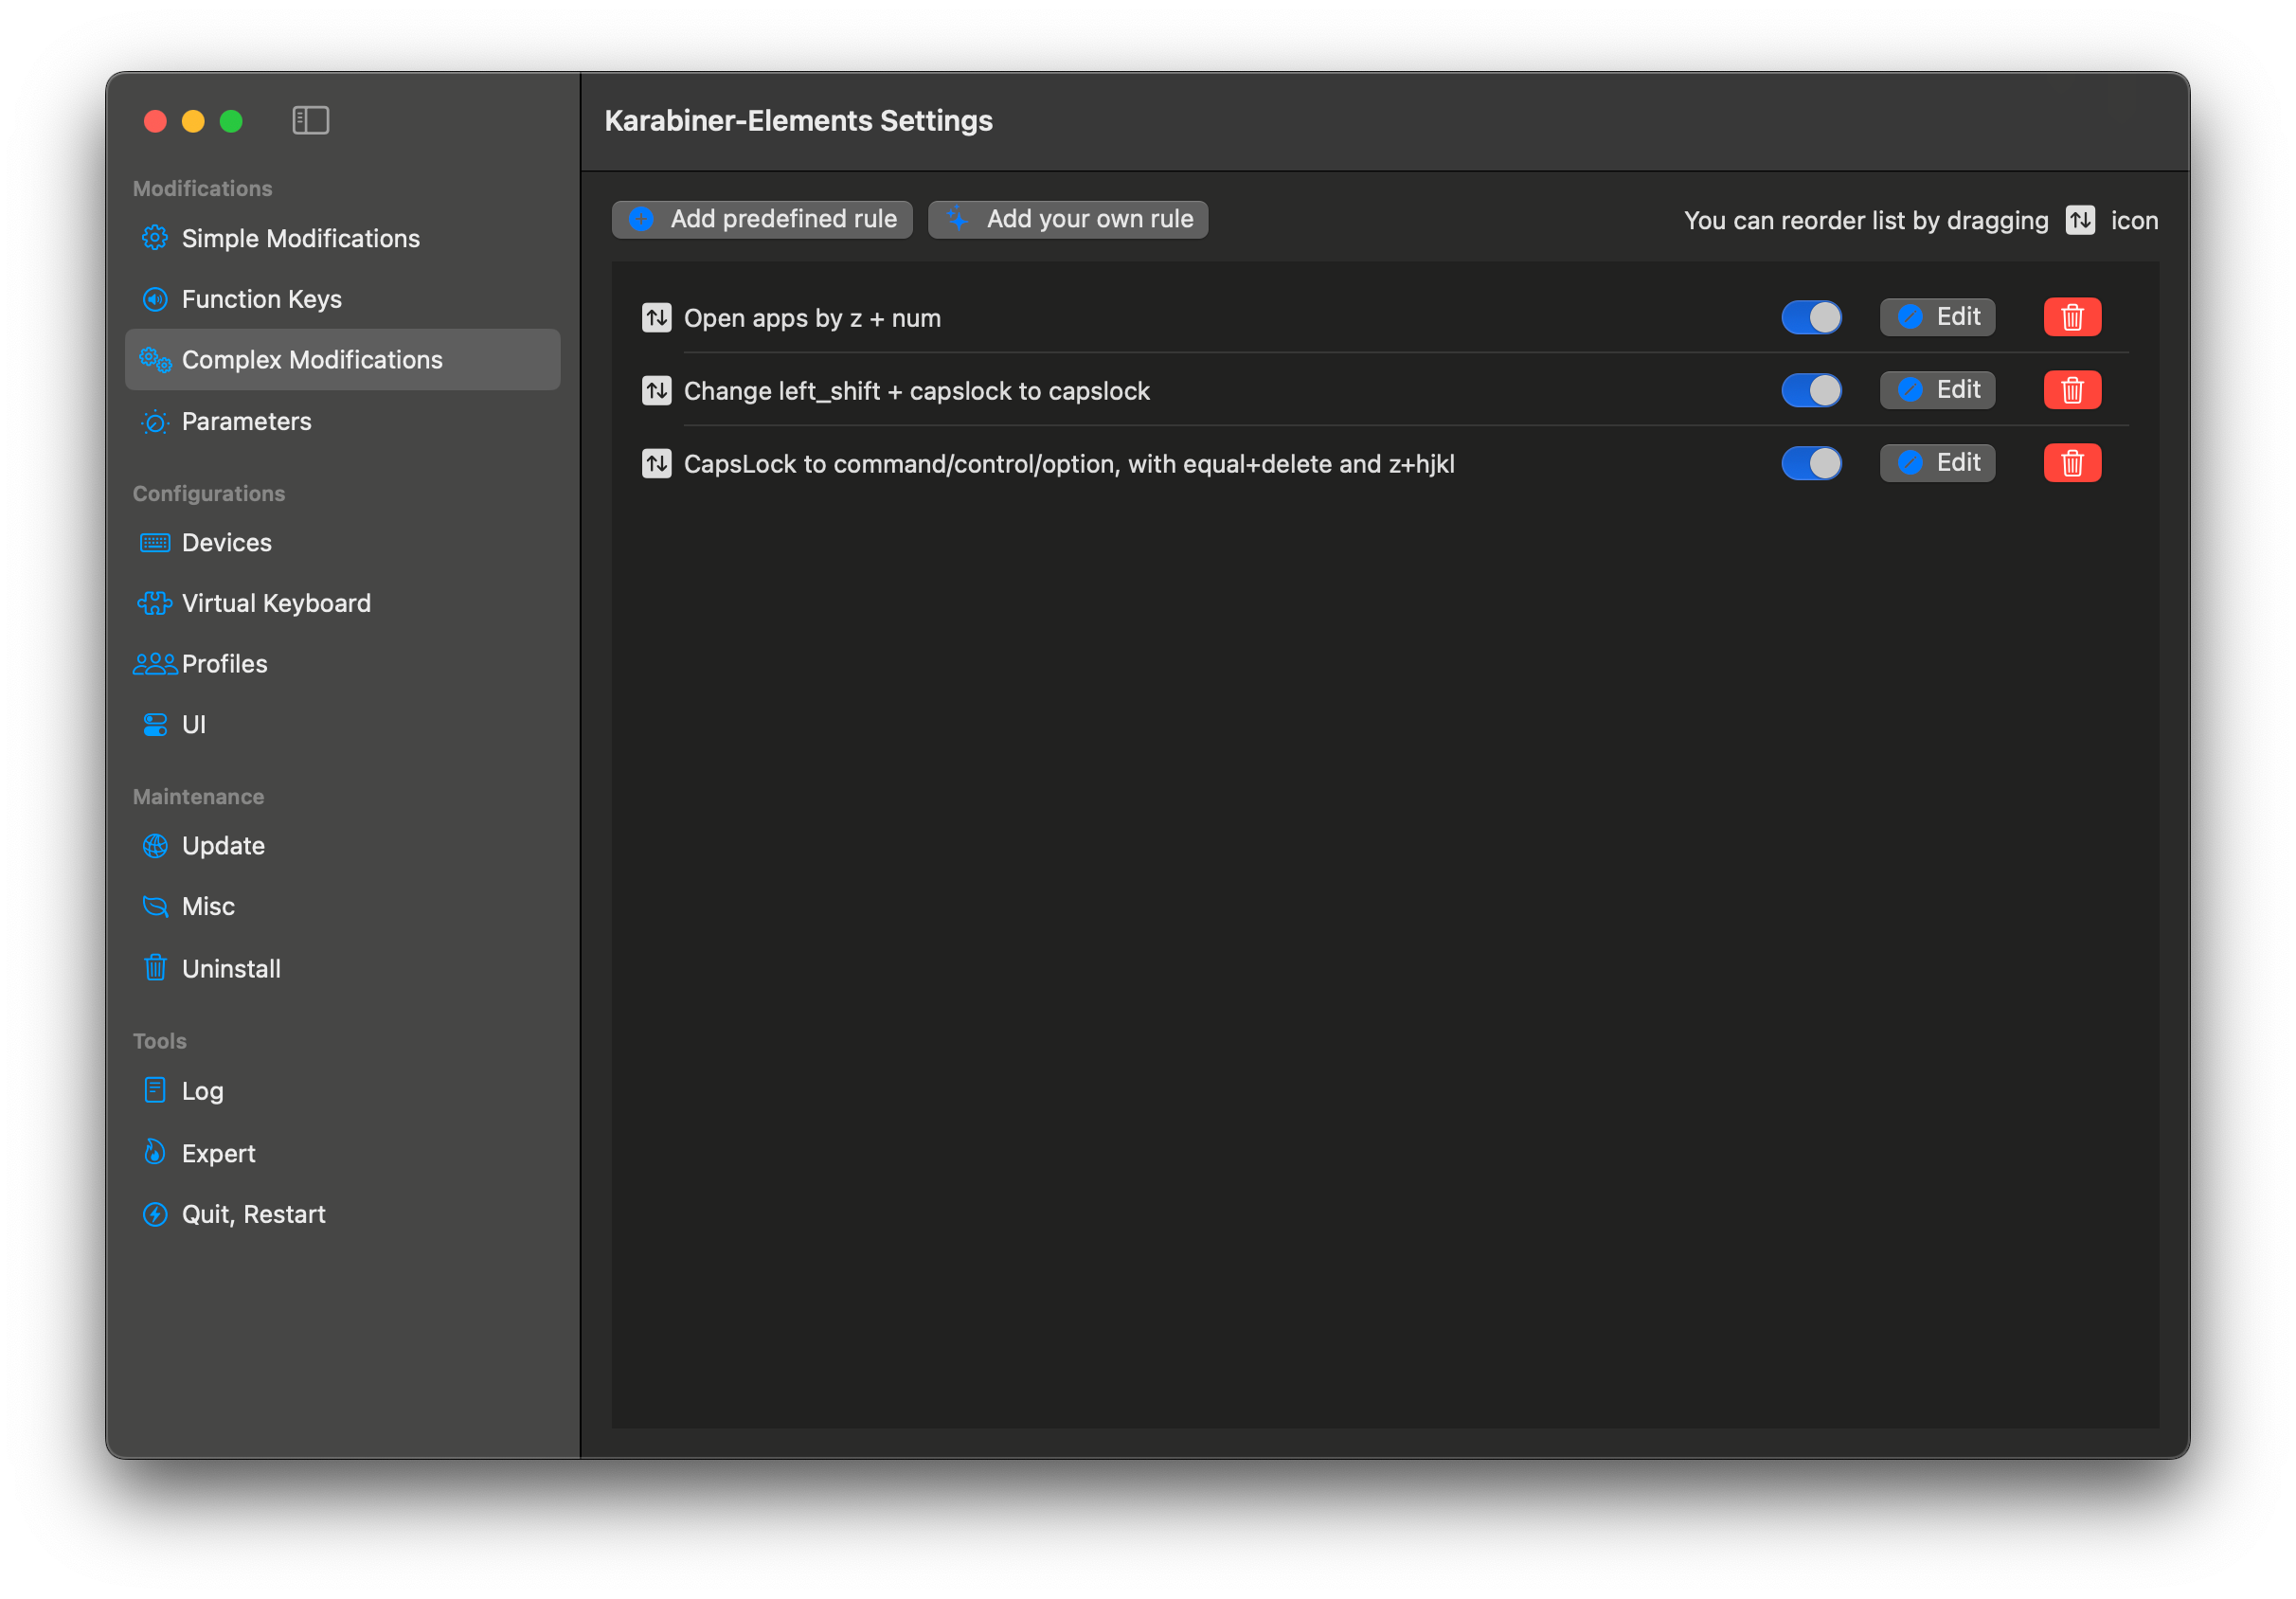
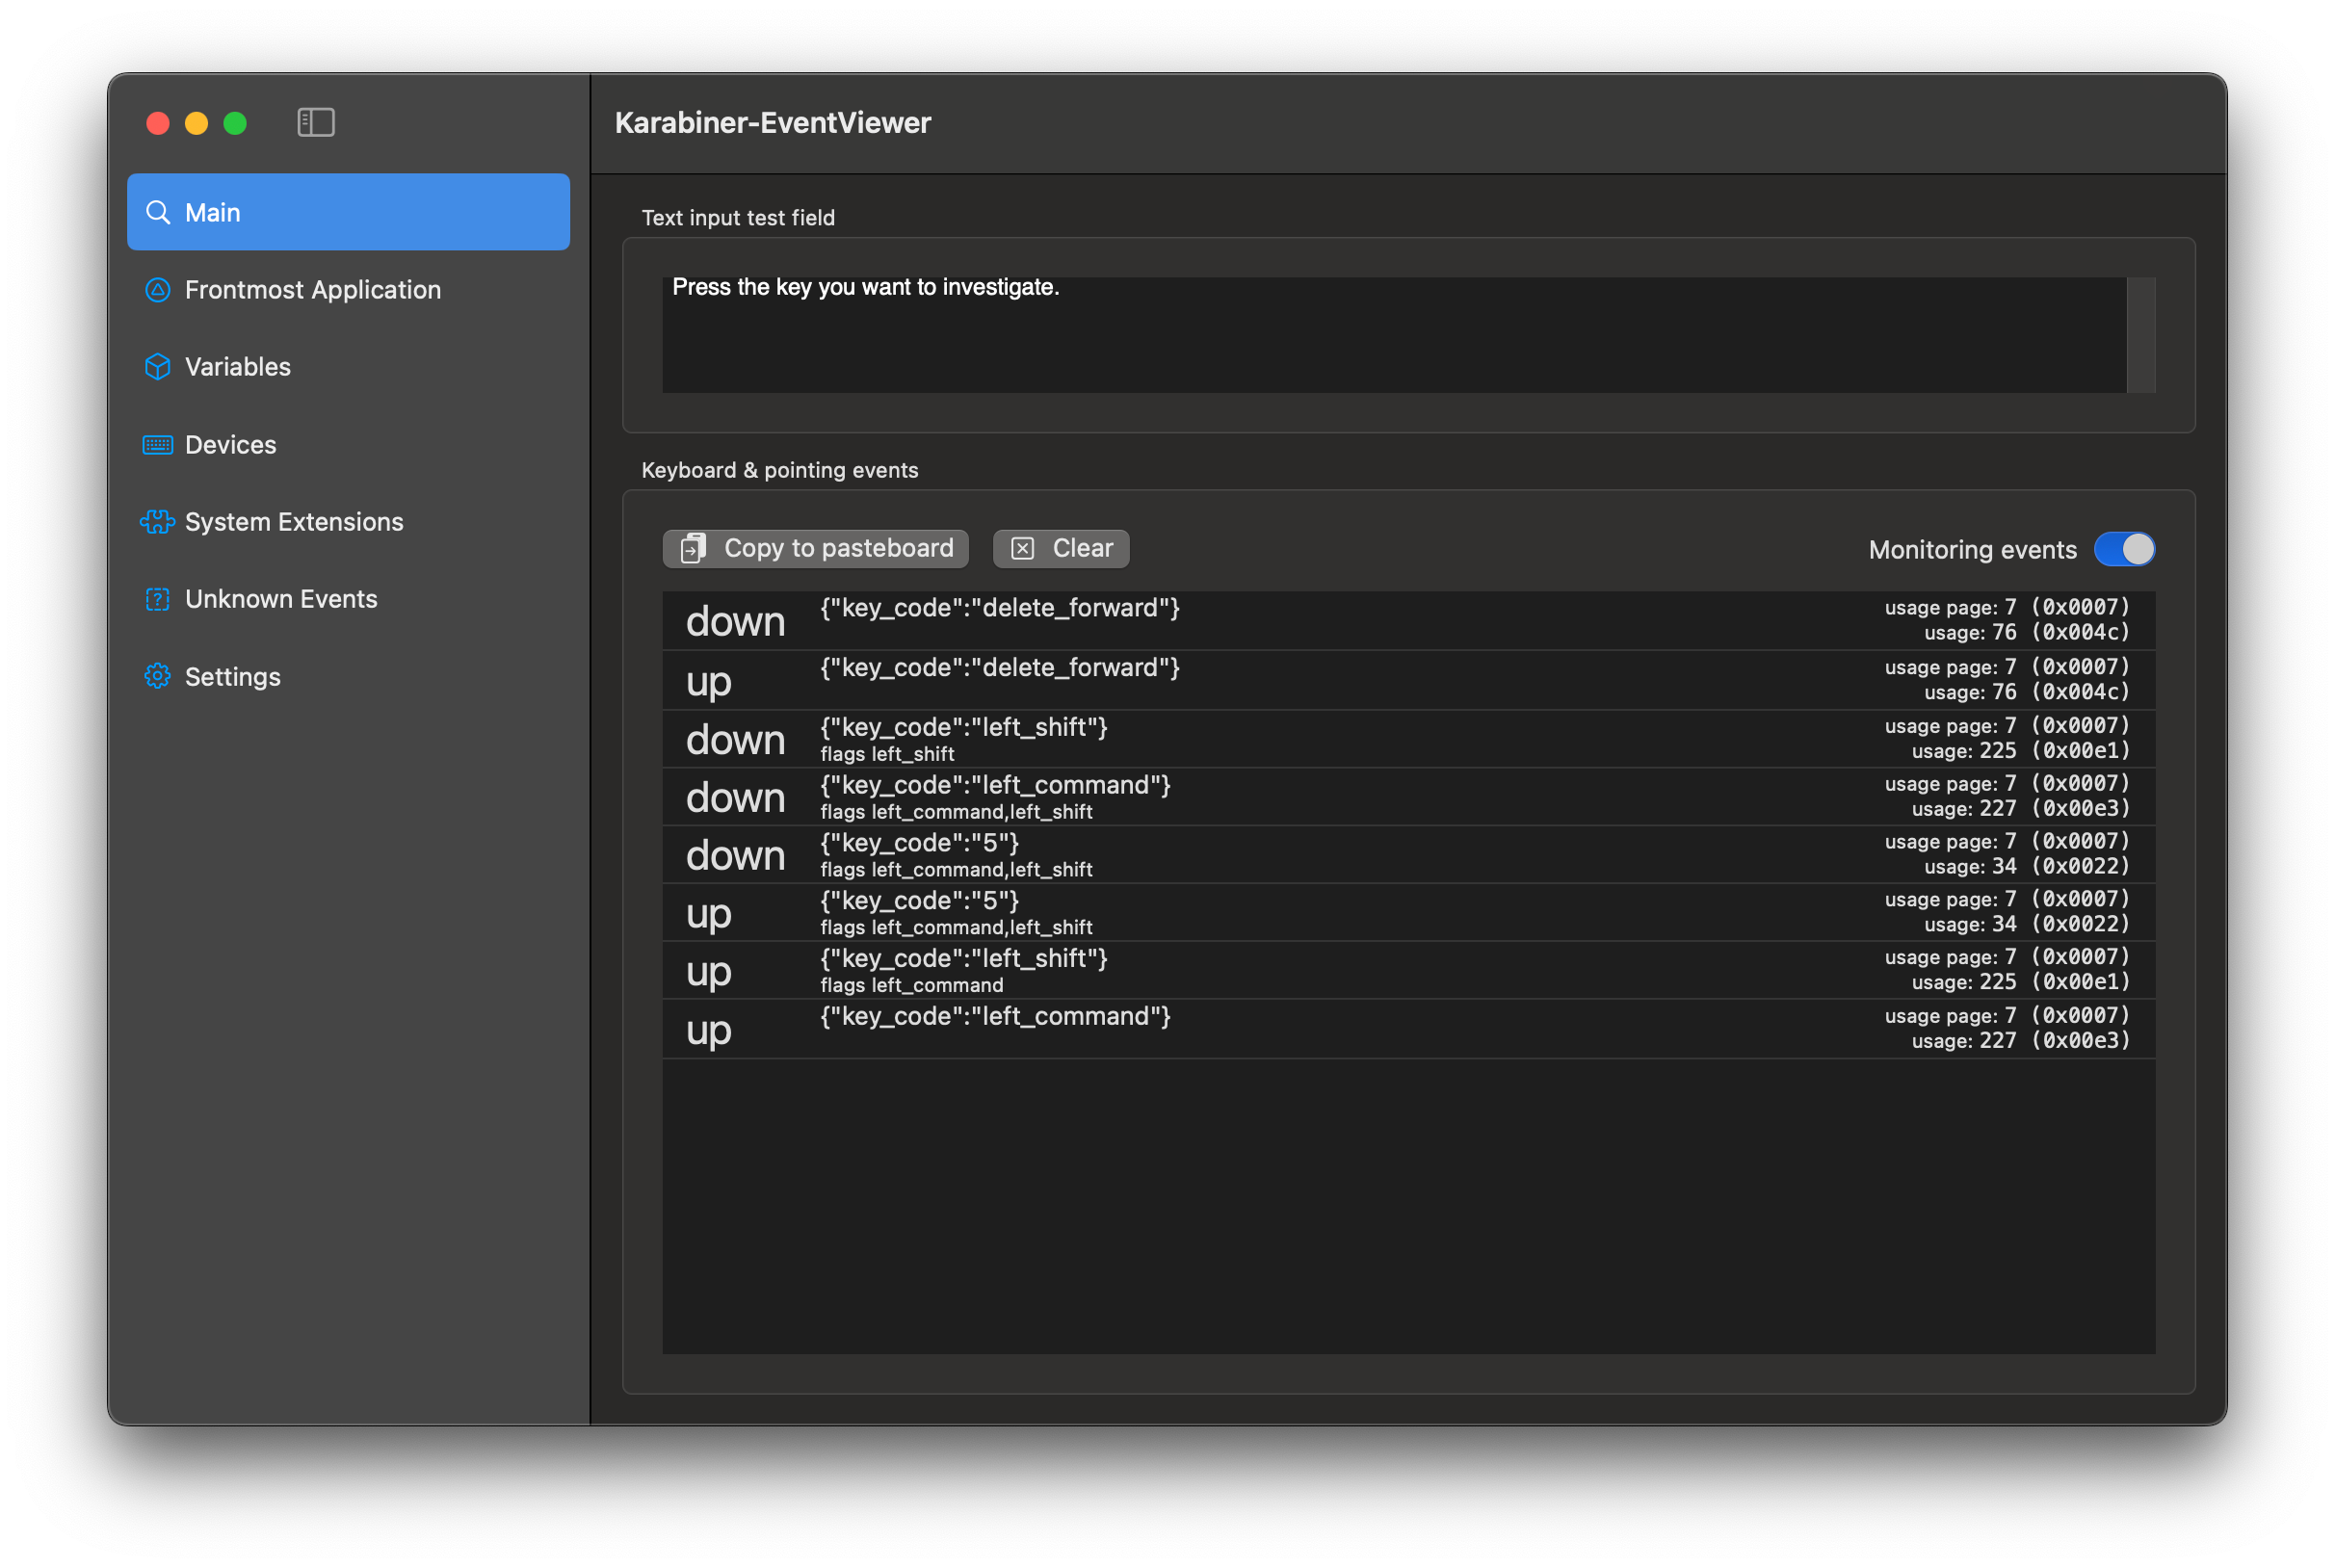
Throughout the blog, if you find anything not working, the Event Viewer is super helpful to debug and display what keys are pressed, the states of the variables, etc.
The z Key
Let's start with the simpler modifications around the z key. I started using
z as my extra modifier (called layer in keyd) ever since I started remapping
my keyboard. The z key is rarely used, meaning I can overload it without
noticeable inconvenience. If you are new to this idea, you can think of z as
another Shift key. The Shift key gives your whole keyboard another layer on
hold, and I just make the z key do the same.
Arrow Keys
I do not like to move my palm to find the arrow keys. I am used to pressing the
z key as the modifier and use hjkl as the four arrow keys. hjkl references
the four direction in Vim, where h is left, j is down, k is up, and l is
right.
For our first rule, navigate to the complex configurations tab in
Karabiner-Elements and add a new rule. First, we give a description and set a
variable with the
to.set_variable
function to indicate the z key is held.
{
  "description": "z + hjkl for arrow key",
  "manipulators": [
    {
      "from": {
        "key_code": "z",
        "modifiers": { "optional": ["any"] }
      },
      "to": [{ "set_variable": { "name": "z_pressed", "value": 1 } }],
      "to_after_key_up": [
        { "set_variable": { "name": "z_pressed", "value": 0 } }
      ],
      "to_if_alone": [{ "key_code": "z" }],
      "type": "basic"
    }
  ]
}
Manipulators in Karabiner are applied in the order that they are defined, from
the top to the bottom. This first manipulator defines 3 things when the z key
is pressed (from):
- (
to) whenzis pressed, set the variablez_pressedto 1 - (
to_after_key_up) whenzis released after press, set the variablez_pressedto 0 - (
to_if_alone) whenzis pressed and released without another key is being pressed, outputz
The z_pressed variable is what makes z behaves like a modifier. Notice
that the third rule, to_if_alone, is important. Otherwise, we lost the z
key.
Then, based on the z_pressed variable, modify the hjkl to output the arrow
keys when z is pressed using
conditions.variable_if.
For example, only when z_pressed is true, remap j to down_arrow:
{
  "description": "z + hjkl for arrow key",
  "manipulators": [
    // others ...
    {
      "conditions": [
        { "name": "z_pressed", "type": "variable_if", "value": 1 }
      ],
      "from": {
        "key_code": "j",
        "modifiers": { "optional": ["any"] }
      },
      "to": [{ "key_code": "down_arrow" }],
      "type": "basic"
    }
    // similar for k, h, and l for up, left, and right respectively
  ]
}
Opening Apps
This is something I added in Mac, I want to use the z + <num> combination to
open specific apps, like what I can do in Windows/Ubuntu that opens apps that
are pinned to the dock with Win + <num>.
We can reuse the z_pressed variable across different rules. For the to
event, we can use
software_function.open_application
and supply a file path.
Here is a sample configuration for mapping z + 1 to open iterm2.
{
  "description": "Open apps by z + num",
  "manipulators": [
    {
      "conditions": [
        { "name": "z_pressed", "type": "variable_if", "value": 1 }
      ],
      "from": {
        "key_code": "1",
        "modifiers": { "optional": ["any"] }
      },
      "to": [
        {
          "software_function": {
            "open_application": { "file_path": "/Applications/iTerm.app" }
          }
        }
      ],
      "type": "basic"
    }
    // Many others
  ]
}
I have z + 2 as my browser, z + 3 for slack, z + 4 for Notion, etc. You
can define what apps you would like to set for each key. On Mac, usually you
will be able to find the file path of an application in the /Applications
folder.
More Shortcuts
I added a few more shortcuts with the z key, this includes:
z + vtoCommand + Shift + vfor paste without formattingz + ptoCommand + Shift + pfor command prompt in VS Codez + slashtoCommand + Shift + slashfor the Help Menu on the menu bar
Here is one example for z + v to Command + Shift + v. You can add multiple
modifier keys in the to list.
{
  "conditions": [{ "name": "z_pressed", "type": "variable_if", "value": 1 }],
  "from": {
    "key_code": "p",
    "modifiers": { "optional": ["any"] }
  },
  "to": [
    {
      "key_code": "p",
      "modifiers": ["left_command", "left_shift"]
    }
  ],
  "type": "basic"
}
At last, same as what I did in Ubuntu keyd, I remapped z+i and z+o back to
zi and zo because it is common to type zi and zo together when typing
fast and then the z key is captured and missed. For me, they are the two most
common characters following z.
{
  "description": "z + hjkl for arrow key",
  "manipulators": [
    // others ...
    {
      "conditions": [
        { "name": "z_pressed", "type": "variable_if", "value": 1 }
      ],
      "from": {
        "key_code": "i",
        "modifiers": { "optional": ["any"] }
      },
      "to": [{ "key_code": "z" }, { "key_code": "i" }],
      "type": "basic"
    }
    // similar for o
  ]
}
I will share the full karabiner configs below at the end.
= + Delete
In Windows or Ubuntu, there are Backspace and Delete. Backspace removes
the character on the left (backward) of the cursor, while Delete removes the
right (forward).
In Mac, the Delete key is actually backspace and there is no Delete key. I
find it inconvenient, and it looks like it is a common modification in Karabiner
to remap = and Delete pressing simultaneously to be the actual Delete,
using the
from.simultaneous
function.
{
  "description": "Change equal+delete to forward_delete if these keys are pressed simultaneously",
  "manipulators": [
    {
      "from": {
        "modifiers": { "optional": ["any"] },
        "simultaneous": [
          { "key_code": "equal_sign" },
          { "key_code": "delete_or_backspace" }
        ]
      },
      "to": [{ "key_code": "delete_forward" }],
      "type": "basic"
    }
  ]
}
Remapping CapsLock
Now we get into the complicated part!
As mentioned above, I am used to CapsLock mapping to Ctrl in Windows or
Ubuntu. There is only Ctrl key in Windows / Ubuntu, and it is the most used
modifier key for me. Mapping CapsLock to Ctrl makes my left pinky feels so
much better. However, there are Command and Ctrl on Mac, I need to choose
which one to map to.
Command: The placement for Command in Mac is not bad. I can easily do
Command+C, Command+V with left thumb pressing Command. I can learn to use
my thumb to press Command related shortcuts. However, I still use my Ubuntu
laptop and I find it weird that I accidentally press the Alt key because of
the habit of using Command in mac. I want the shortcuts to be as consistent as
possible across all machines I use. As such, for most of the time, I still remap
CapsLock to Command on the Mac, and so the placement of shortcuts like copy
and paste remains consistent.
Control: However, there are times that I need the Ctrl key more than the
Command key on Mac. For example, I often need Ctrl+C to stop a process in
the terminal, or Ctrl+U and Ctrl+D to move up and down in Vim mode in text
editors. I am used to expecting the CapsLock key to work as a Ctrl in those
cases. Therefore, for the terminal and some text editors, I map CapsLock to
Ctrl key.
Option: To make it even more complicated, when I do
CapsLock + Backspace, I want it to function like Ctrl + Backspace in
Windows/Ubuntu, which deletes 1 word at a time. For me, backspace a word
(Option + Backspace) is more common than backspacing a line
(Command + Backspace). So I want CapsLock to be Option when it is used
with Backspace. And similarly, I want CapsLock to be Option when I do the
= + Backspace for forward deleting a word.
Escape: Last but not least, map CapsLock to Escape when pressed alone.
In summary, I am mapping CapsLock to Command, Ctrl, Option when it is
pressed with another key, depending on the scenario, and map it to Escape when
pressed alone.
I am overloading CapsLock so much because it is in such a comfortable position
in a standard QWERTY keyboard and I want to maximize its functionality, and at
the same time create a very similar functionality compare to the Ctrl key in
Windows/Ubuntu.
The CapsLock Variable
After a lot of investigation and experimentation, to be able to remap the
CapsLock key to multiple modifier keys depending on the second key in the
combination, I must use a variable. I need to wait until the second key is
pressed to know which key the CapsLock to map to. I cannot simply remap
CapsLock to another modifier key when it is pressed.
For example, if I remap CapsLock to Command when CapsLock is pressed, then
it will always be Command + something when I hold down CapsLock. When I
press Backspace it will be Command + Backspace, which I don't want. I cannot
"lift" the Command key when Backspace is pressed, and change it to
Option + Backspace instead.
What I can do instead, is define a caps_lock_is_held variable like the
z_pressed variable demonstrated above, and depending on which key is pressed,
conditionally add a modifier to the key pressed. If it is a Backspace, we do
Option + Backspace. If it is another key, we do Command + <key>. To
conclude, when CapsLock is being held, no modifier is triggered. Only when
another key is pressed, a modifier is being added conditionally. This gives the
flexibility we want.
And lastly, when CapsLock is pressed alone, map it to Escape. The
configuration looks like this:
{
  "description": "CapsLock",
  "manipulators": [
    {
      "from": {
        "key_code": "caps_lock",
        "modifiers": { "optional": ["any"] }
      },
      "to": [
        { "set_variable": { "name": "caps_lock_is_held", "value": true } }
      ],
      "to_after_key_up": [
        { "set_variable": { "name": "caps_lock_is_held", "value": false } }
      ],
      "to_if_alone": [{ "key_code": "escape" }],
      "type": "basic"
    }
  ]
}
Please note that we only need to use variable because we want to map a single
key to a different modifier key depending on the second key. If the modifier key
is always consistent, we can map the CapsLock key with a simple from to
manipulators. For example:
{
  "description": "CapsLock to Command/Escape",
  "manipulators": [
    {
      "from": {
        "key_code": "caps_lock",
        "modifiers": { "optional": ["any"] }
      },
      "to": [{ "key_code": "left_command" }],
      "to_if_alone": [{ "key_code": "escape" }],
      "type": "basic"
    }
  ]
}
I started with this configuration, but only when I am not satisfied I created more and switched to using variables. There are drawbacks for using variables, which I will explain below.
CapsLock as Option
First, we start with the simplest. Remapping CapsLock + Backspace to
Option + Backspace.
{
  "description": "CapsLock",
  "manipulators": [
    // Other manipulators
    {
      "conditions": [
        { "name": "caps_lock_is_held", "type": "variable_if", "value": true }
      ],
      "from": {
        "key_code": "delete_or_backspace",
        "modifiers": { "optional": ["any"] }
      },
      "to": [
        {
          "key_code": "delete_or_backspace",
          "modifiers": ["left_option"]
        }
      ],
      "type": "basic"
    }
  ]
}
This configuration specifies if the caps_lock_is_held variable is true, and
the backspace key is pressed, output the backspace key with the left option
modifier.
CapsLock as Control
In some apps, I would like to use CapsLock as Control, so that I can do key
combinations that I am used to. Karabiner supports conditionally apply
manipulators by the applications using
frontmost_application_if.
It identifies an application by the bundle identifiers or the file paths. The
list of keys I remapped is mostly Vim key bindings or shortcuts in the terminal.
The following example is for mapping CapsLock + c to Control + c.
{
  "description": "CapsLock",
  "manipulators": [
    // Other manipulators
    {
      "conditions": [
        { "name": "caps_lock_is_held", "type": "variable_if", "value": true },
        {
          "bundle_identifiers": [
            "^com\\.googlecode\\.iterm2$",
            "^com\\.jetbrains\\.rider$",
            "^com\\.google\\.android\\.studio$"
          ],
          "file_paths": ["/Applications/Cursor.app/Contents/MacOS/Cursor"],
          "type": "frontmost_application_if"
        }
      ],
      "from": {
        "key_code": "c",
        "modifiers": { "optional": ["any"] }
      },
      "to": [
        {
          "key_code": "c",
          "modifiers": ["left_control"]
        }
      ],
      "type": "basic"
    }
  ]
}
What this rule defines is if the app is iTerm2, Rider, Android Studio or Cursor,
CapsLock + c becomes Control + c. I did the same for
["a", "c", "d", "o", "r", "u", "v"].
CapsLock as Command
For all the remaining scenarios, I want CapsLock to function as Command.
Karabiner provides a way to remap any key by doing
from.any
key code. Unfortunately,
it does not support returning what is that any key being captured.
We cannot conveniently do from CapsLock + any to Command + any, and
Karabiner substitutes the "any" in.
Therefore, as you might have thought on when writing the rules above, I need to
use a script to generate all the combinations. Here is a sample manipulator for
the key a, to map CapsLock + a to Command + a:
{
  "conditions": [
    { "name": "caps_lock_is_held", "type": "variable_if", "value": true }
  ],
  "from": {
    "key_code": "a",
    "modifiers": { "optional": ["any"] }
  },
  "to": [
    {
      "key_code": "a",
      "modifiers": ["left_command"]
    }
  ],
  "type": "basic"
}
I wrote a python script to generate this rule for every single key I need on the keyboard:
def set_command_key(data, key_code):
    data["manipulators"].append(
        {
            "conditions": [
                {"name": "caps_lock_is_held", "type": "variable_if", "value": True},
            ],
            "from": {"key_code": key_code, "modifiers": {"optional": ["any"]}},
            "to": [{"key_code": key_code, "modifiers": ["left_command"]}],
            "type": "basic",
        }
    )

def generate_rule():
    # some more code

    command_keys = (
        [chr(i) for i in range(ord("a"), ord("z") + 1)]
        + [chr(i) for i in range(ord("0"), ord("9") + 1)]
        + [
            "grave_accent_and_tilde",
            "hyphen",
            "equal_sign",
            "tab",
            "open_bracket",
            "close_bracket",
            "backslash",
            "semicolon",
            "quote",
            "return_or_enter",
            "comma",
            "period",
            "slash",
            "spacebar",
            "left_arrow",
            "right_arrow",
            "up_arrow",
            "down_arrow",
        ]
    )
    for key in command_keys:
        set_command_key(data, key)
What this script does is for all the keys from a to z, plus all keys from
0 to 9, and all the symbol keys, space bar, arrow keys, and enter key,
create a rule like the one above. It maps from CapsLock + <key> to
Command + <key>.
CapsLock + z
If you are following along, and you test the configuration now, you will notice
CapsLock + z might be messed up at this point. Depending on how you order
the rules, you may result in different behaviours. In Karabiner, a rule ranked
higher in the list of configurations will be applied first. CapsLock + z may
not work as Command + z because earlier the z + ... rules already captured
the z key. In addition to that, CapsLock + z + h/j/k/l will not work as how
you would expect for Command + arrow keys.
To fix it, we need to define additional rules for the z rules based on the
caps_lock_is_held variable. For example, for z + h:
{
  "description": "CapsLock",
  "manipulators": [
    // Other manipulators
    {
      "conditions": [
        { "name": "caps_lock_is_held", "type": "variable_if", "value": false },
        { "name": "z_pressed", "type": "variable_if", "value": 1 }
      ],
      "from": {
        "key_code": "h",
        "modifiers": { "optional": ["any"] }
      },
      "to": [{ "key_code": "left_arrow" }],
      "type": "basic"
    },
    {
      "conditions": [
        { "name": "caps_lock_is_held", "type": "variable_if", "value": true },
        { "name": "z_pressed", "type": "variable_if", "value": 1 }
      ],
      "from": {
        "key_code": "h",
        "modifiers": { "optional": ["any"] }
      },
      "to": [
        {
          "key_code": "left_arrow",
          "modifiers": ["left_option"]
        }
      ],
      "type": "basic"
    }
  ]
}
Two rules are defined for each z + h/j/k/l combination, one with CapsLock
held and one not. If the CapsLock is held, add an option modifier. As you can
imagine, all of these are generated with the python script.
CapsLock + click
If you map CapsLock directly to Command, you will be able to CapsLock and
left click on mouse to be like Command + click. The problem with variables is
this is no longer possible. Karabiner support mapping mouse click like key
presses with from.pointing_button.
{
  "description": "CapsLock",
  "manipulators": [
    // Other manipulators
    {
      "conditions": [
        { "name": "caps_lock_is_held", "type": "variable_if", "value": true }
      ],
      "from": {
        "modifiers": { "optional": ["any"] },
        "pointing_button": "button1"
      },
      "to": [
        {
          "modifiers": ["left_command"],
          "pointing_button": "button1"
        }
      ],
      "type": "basic"
    }
  ]
}
However, Karabiner does not support remapping the built-in trackpad on MacBook Pro. If you check the list of devices in Karabiner settings, you will see the trackpad is not supported. Here is the issue for this problem. I tried enabling overriding the trackpad by enabling unsafe configuration, as shown here. It made my trackpad unusable and I cannot see my cursor any more. And as stated in the linked comment, unsafe mode is not recommended. If you lost the trackpad, you can quit the process in the terminal, see this documentation page on quitting Karabiner.
Left Shift + CapsLock
At last, we need to be able to get back CapsLock when needed. Same as before,
I use left Shift + CapsLock and map it back to CapsLock.
{
  "description": "Change left_shift + capslock to capslock",
  "manipulators": [
    {
      "from": {
        "key_code": "caps_lock",
        "modifiers": {
          "mandatory": ["left_shift"],
          "optional": ["any"]
        }
      },
      "to": [
        {
          "key_code": "caps_lock",
          "modifiers": []
        }
      ],
      "type": "basic"
    }
  ]
}
Full Configuration
This is it! Other than the complicated, generated rules for CapsLock, the rest
are quite simple.
Comparing AutoHotKey, keyd and Karabiner
I started remapping my keyboard with AutoHotkey on Windows, dual boot to Ubuntu and switched to keyd, and now learned to configure Karabiner for Mac. All three have different philosophy around how keyboards can be remapped.
I find AutoHotkey the most powerful. It is almost a tool with too many
features. It can control mouse, perform string replacements, and many more like
retrieving the screen, modifying file systems, etc. In contrast, it is a common
practice for Unix daemons to focus and handle a single domain, and chain
different daemons to perform complex things. However, given its powerful
features, I think AutoHotkey is also the hardest to get started. This includes
the subtle difference between v1 and v2, its syntax and philosophy is harder to
understand, and overall harder to integrate. For example, I had to do a few
steps to build the configuration and automatically run it like a daemon on
Windows startup.
For keyd, I like its philosophy and syntax the most. The concept of layers and
each configuration is applying a new layer for the keyboard is clear. The
configuration syntax is concise and easy to understand. I also like that it
works great with Wayland in Gnome and is very easy to enable, reload and test.
The instructions in the man page are clear too. The monitor command is super
useful to debug. My major wish for keyd is to expand what it can support out
of the box, like Unicode characters and string replacements. Also, so far I
cannot find a keyboard tool that can control the mouse in Wayland. If keyd can
do that, that would be awesome.
For Karabiner, I think it is the easiest to integrate and configure. Same as
many apps on macOS, it is the easiest in terms of installation and getting
started. It just works. Not a single command or configuration needed for it to
start and auto-reload. The event viewer is also super useful for debugging.
Having a GUI and ability to share configurations in app is a bonus. My biggest
complaint is the syntax and configuration is just hard to use. I consider the
JSON syntax the hardest to read and write. The built-in editor is also
user-unfriendly, to the point that the window cannot even be resized. Using
variables is comparatively worse than the concept of layers in keyd. As shown
in the above example, a lot of the rules need to be generated from a script for
every permutation of combination I add. It is considerably much harder to
configure nested layers like what I can do in keyd. And of course, I really
wish I can get which key code is pressed if I captured with
from.any = "key_code".
Just my 0.02 after using all three of them. I understand it is unfair to compare, as each of them are limited by the operating system or window manager that the system is using. Users cannot freely choose or switch between either because of their operating systems.
Conclusion
Overall, despite the complexity, I still enjoy configuring and tuning the configurations to a state that I am satisfied with. Thanks for reading, and I hope this is helpful for people attempting to create something similar. Now I finally have a somewhat consistent keyboard shortcuts across Windows, Mac and Ubuntu that I can share!
Remarks
- If you are interested about keyboards, you may be interested at the keyboard page
- If you are interested about other shortcuts on mac, see this page
- Mac keyboard shortcuts
- Take a screenshot on Mac